the CD-Rom...
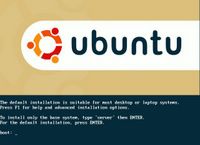
1)Once the CD Autoboots, you would get a Ubuntu Logo Screen with 'boot' prompt...
2)Press ENTER to begin the installation
Note: Entire Installation is in TEXT-Based Mode, no GUI-based is available.
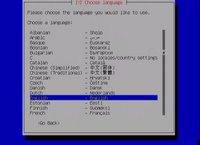
3)It would prompt for 'Choose Language', select English
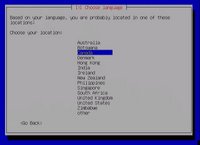
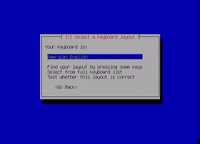
4)Now it prompts for 'Choose Location', select as appropriate5)Keyboard Layout selection confirmation dialog appears...confirm and press ENTER
6)Now various hardware detection and IDE,Ports configuration would take place...so sit back and relax
7)Various Modules and Softwares would be Unpacked next...
8)Network configuration box appears.. It wud try auto-detect via DHCP or if it fails, it would ask whether you want to configure ManuallyYou can select as appropriate...
Note: If you use DSL or PPPoe type Internet Connection, do not configure your internet manually, just skip to next step
9)Now it prompts for the Hostname... by default it says 'Ubuntu', you can configure it to anything...its just like Computer Name while Windows Installation
10)Now main part comes is Partitioning of Disks...
Now, select your appropriate HDD(in-case of multiple hdd's)..
Mostly it would be something like
Erase entire disk: IDE1 master(hda) - 37GB, etc..
11)Next screen it would show you two partitions made, one of 'ext3' filesystem and other a 'SWAP' partitionIf you selected the proper HDD in earlier step... select YES for 'Write Changes to the disk'
12)Now installation of Base System would begin so sit back and enjoy..
13)Timezone configuration box prompts after above step..select your Timezone and confirm
14)Now user setup comes up... Enter your full name for the User, in next screen select a short username for logon (This username is what you would use to login) and then the password bviously!
15)Now, the Boot Loader configuration comes... If it shows your already installed Windows Installation, like Windows XP Professional.. its safe to install the Boot Loader on MBR without any problems...
16)Now, it would prompt for a REBOOT... upon reboot..enter your Bios and put First Boot Priority to Harddisk i.e. ur Windows one
17)Now, it would show you Loading GRUB 1.5..and then list various OS...with 4 entries for ubuntu and under Other Operating Systems, it would list Windows XP Professional
18)Boot your Ubuntu, the first in the listit would complete the remaining installation
19)Now X-Server Configuration appears.. select the various resolutions your monitor supports and confirm
20)Thats it.. your installation is completed and your Ubuntu Logon screen appears.. Put in your 'username' used in step14 and password to get inside.
Now, after installation you can reboot and use your Windows XP by selecting it from the Boot Menu
If you want to configure Windows XP as the default OS for booting each time, boot into Ubuntu Navigate to My Computer>Filesystem>boot>grub>menu.lst
Open the menu.lst file in text editor..it wud be having something like this at start:
# Generated by grubconf-0.5.1
default=1
timeout=10
Change the default=1 to default=4
Thats it...now your XP is the default booting system next time onwards.
Enjoy your Ubuntu..and do let me know if you face problems..
Few Screenshots...


A comprehensive list of screenshots while installation can be checked at: http://shots.osdir.com/slideshows/slideshow.php?release=342&slide=1
Keywords: breezy badger,edubuntu,free,installing ubuntu,linux,linux operating system,linux os,linux support,open source,operating system,software,ubuntu,ubuntu desktop,ubuntu download,ubuntu how to,,ubuntu install,ubuntu laptop,ubuntu linux,ubuntu screenshots,ubuntu server,xubuntu
No comments:
Post a Comment